It only takes 4 simple steps to embed Revit models into your websites. Let’s see how to finish this work.
1. Upload your 3D Models to Modelo
You can simply drag the Revit models to the Modelo upload box. We also suggest that you can use our Modelo&Revit upload plugin. Please watch this short video for details
2. Click the Share icon and select “Embed”

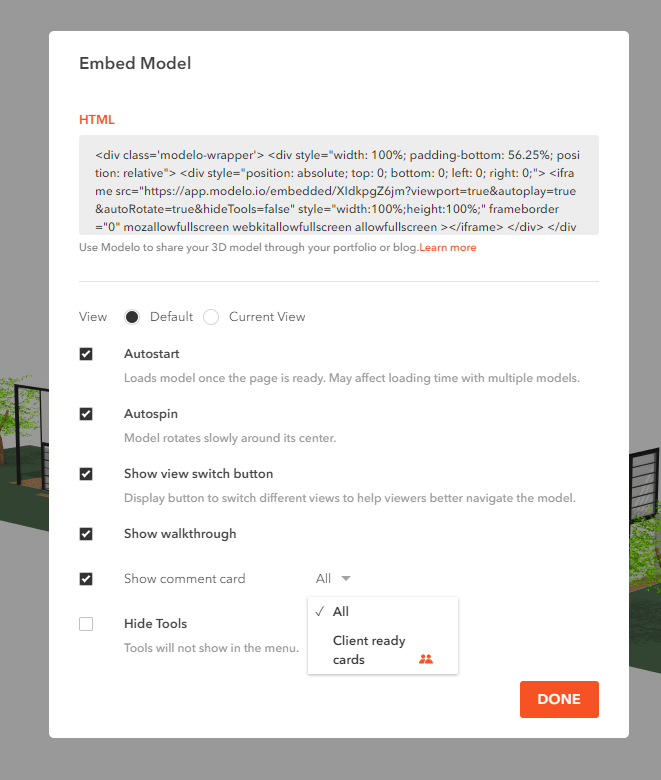
Click the share icon at the far right of the toolbar and select the “Embed” option. This will open an Embed Options popup, which provides you with your HTML code for the iframe.
3. Choose your Embed options

Modelo provides many display options in the embedding window. They can help you display models perfectly in different situations. Please read “Modelo Embedding Option” for more details.
4. Copy and Paste your Embed iframe HTML
With your Embed settings selected from Step 3 copy the iframe text. Switch to the page in your blog or website in which you want to embed, select the embed option and paste!
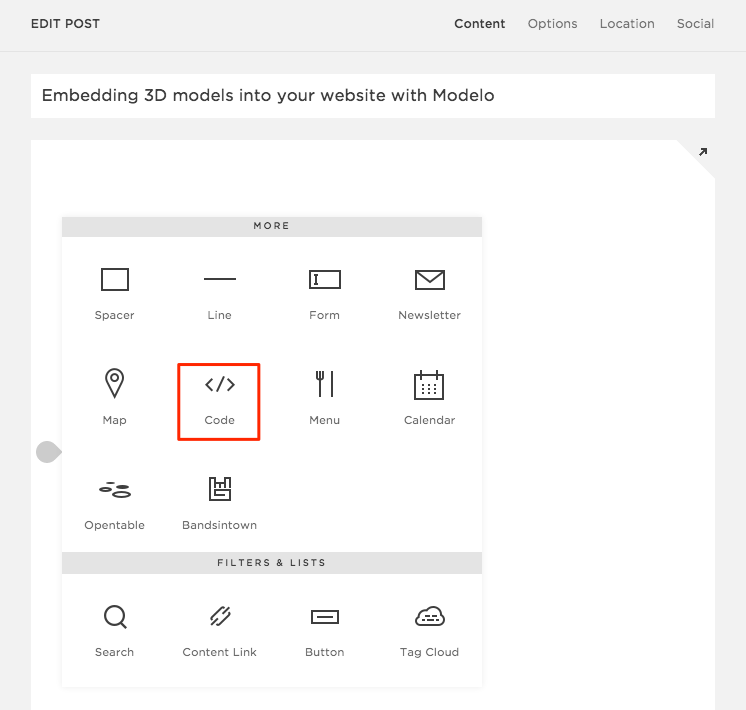
Here’s what it would like in Squarespace (for example):

Add a block and select the “Embed” option outlined here in red, then paste your copied iframe HTML code into the box.
Keep in mind: You will probably need to play around with the settings a bit and explore the embed support options within your own publishing platform.


Thanks for the marvelous posting! I genuinely enjoyed
reading it, you might be a great author.I will be sure to bookmark your
blog and will come back very soon. I want to encourage you to ultimately
continue your great posts, have a nice evening!
Thank you~